This tutorial will guide you through adding Fence collision to your map.
Fence collision is infinite vertical collision that is only collidable on one side. These are typically used as the "walls" of the map so the player can't escape its bounds.
Prerequisites
You will need the following to accomplish the steps in this tutorial:
- The Simpsons Hit & Run for PC
- Lucas' Simpsons Hit & Run Mod Launcher
- Used to run a mod to actually try the map out ingame.
- Lucas' Simpsons Hit & Run Map Builder
- Used to actually build the map of course.
- SketchUp Make 2017
- Knowledge of how to use SketchUp in general will help as these tutorials will assume you're already at least a bit familiar with the software.
- SketchUp Make 2016 as well as newer versions of SketchUp Pro may also work but these tutorials are created with Make 2017 in mind.
- An advanced Text Editor, we recommend Notepad++ or Visual Studio Code
- This is because you'll be working with XML files which are easier to edit in these programs.
- Following the previous tutorials
Step 1: Drawing fences
Fence Collision is represented in SketchUp as a series of lines in a group with a Fence group tag applied to it.
Since fences are one-way collision, which side is solid is determined by how you draw the lines and which tag you use on the group:
FenceCW: The fences will face outwards when drawn in a clockwise motion.FenceCCW: The fences will face inwards when drawn in a clockwise motion.
For this map, you can simply draw a square around the edges. If you draw the lines in such a way that they create a face, be sure to delete that face. Once you're done, group the lines together. Make sure to go in the same direction with all of the lines!
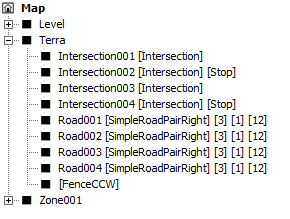
To start, you'll want to focus the Terra group that your roads are in and draw 4 lines going around the bounds of the map.
Assuming you drew the lines in the same direction as the demonstration above (clockwise), you will want to tag use the FenceCCW group tag to make them face inwards towards the playable area.
Step 2: Build and check it out ingame
There's no new rules to add for the fences (they're handled by the BaseZone ModelOutputInstructions) so you're actually already done!
Now it's time to run Build.bat to see if it works ingame.
If you've done everything right, the map should successfully build and your fences should work ingame:
NOTE: This demonstration uses the Debug Text hack included with the Mod Launcher to visualise the fences.
If the collision is backwards from what you'd expect, try swapping out the FenceCCW tag for FenceCW to flip it around.
You're done!
That's it for this tutorial. You're now ready to move on to the next one.